

Overview
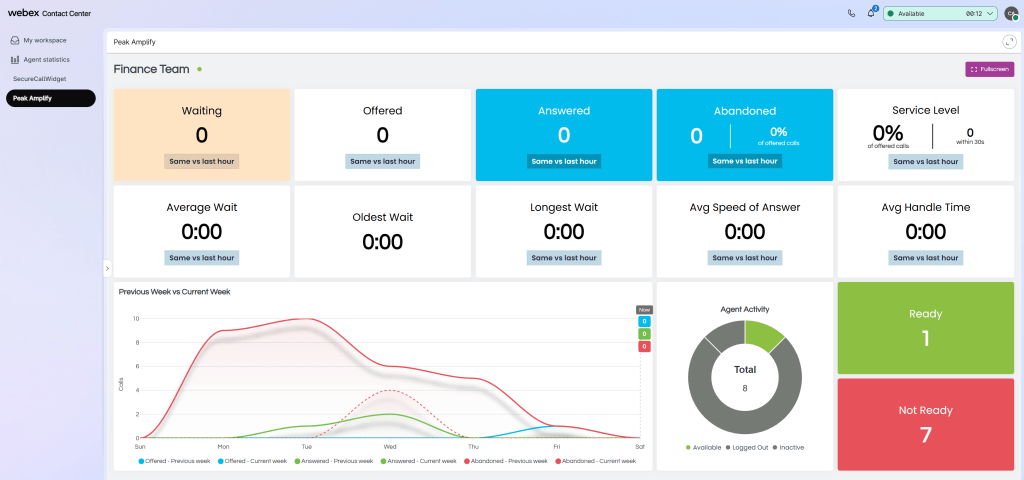
Peak Amplify for Webex Calling and Peak Wallboard for Webex Contact Center are cloud-based add-ons that provide real-time and historical insight into your contact center operations. They empower your organization to oversee Customer Experience and Agent Performance, regardless of whether your team operates from home, on the go, or within office premises.
In this article, you will find out how to embed Peak Amplify within the Webex Contact Center Agent Desktop.
Embedding Peak Amplify in the Webex Contact Center desktop allows agents and supervisors to open the Peak Amplify wallboard directly from the navigation menu in Agent Desktop. This is completed by updating the desktop layout JSON, uploading the revised layout, and refreshing Agent Desktop for the affected team.
Before you begin
-
Please note that Peak Amplify is embedded within the WxCC Agent Desktop by modifying the Desktop Profile
-
Confirm the Teams (and associated Desktop Profiles – where the changes will be made) for the Agents and/or Supervisors where you would like to embed Peak Amplify
-
Ensure you have administrative access to Webex Control Hub and Webex Contact Center, with permission to modify Desktop Layouts
-
Create the ‘Sharable Links’ within Peak Amplify that you would like to embed for each team, and copy the URLs ready for use.
Configuration Steps
Open Desktop Layouts
-
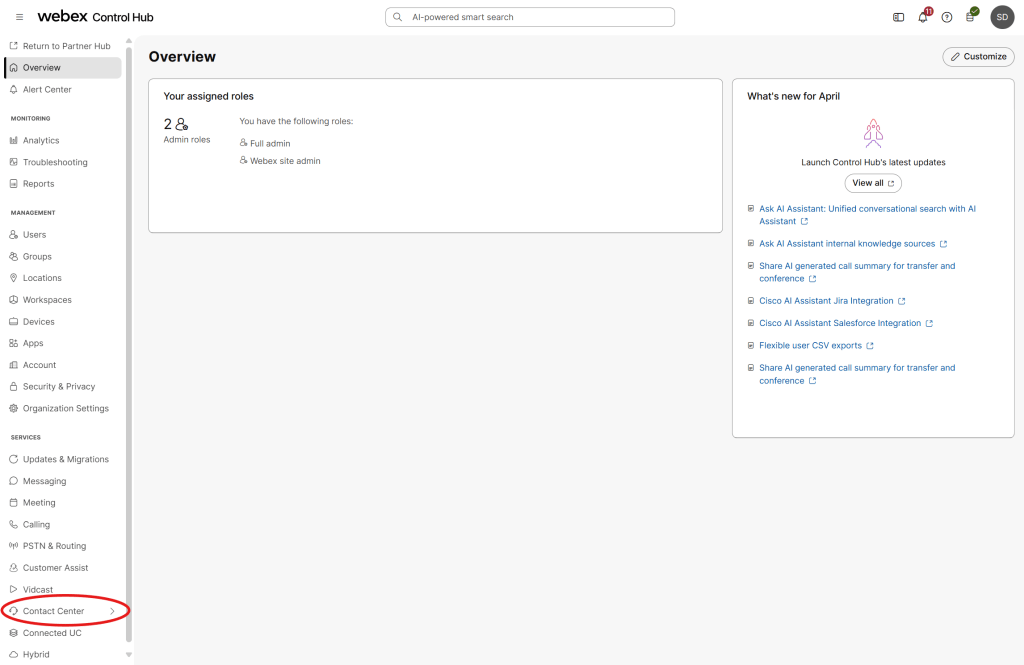
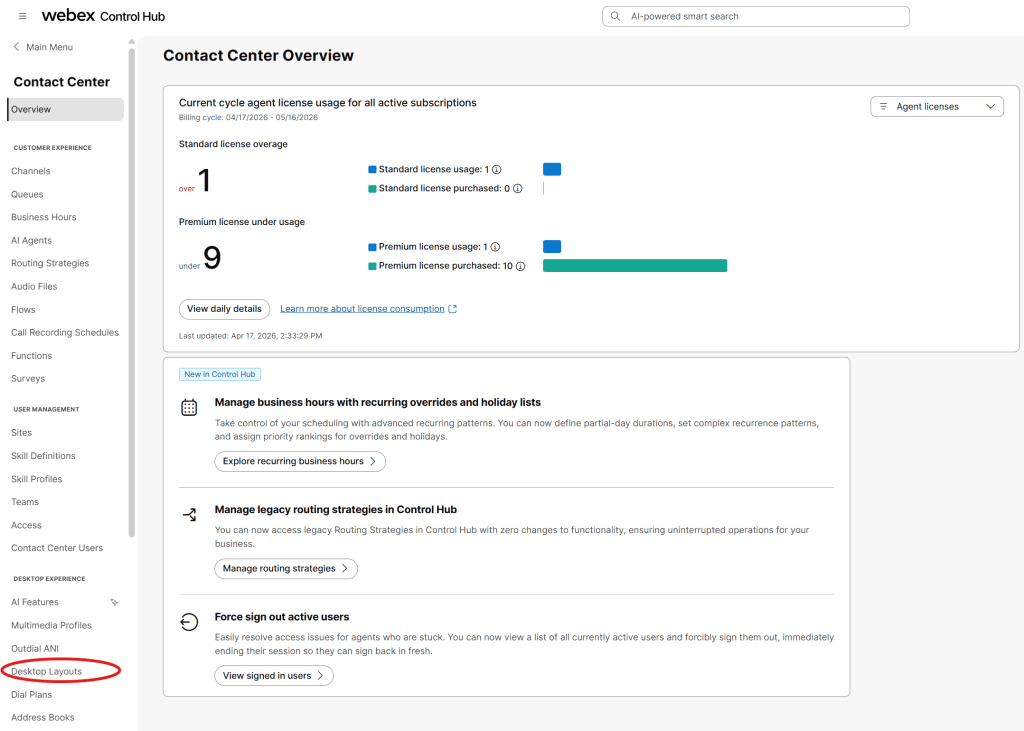
In Webex Control Hub, navigate to Contact Center and then Desktop Layouts
Select the correct layout
-
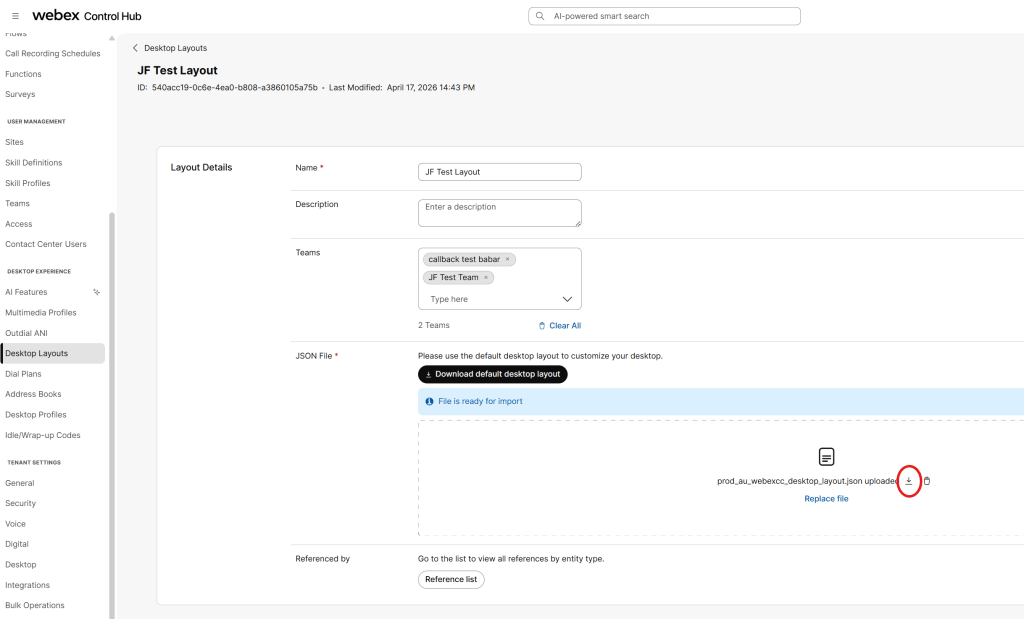
Choose the Desktop Layout that corresponds to the Team(s) where you wish to embed Peak Amplify.
Download the current Desktop Layout file
-
Download the existing Desktop Layout file so that it can be edited and re-uploaded.
Edit the Desktop Layout JSON
-
Open the file in your preferred text/code editor and locate the “navigation” section within the “agent”, “supervisor” or “supervisorAgent” sections depending on whether you would only like Peak Amplify embedded for certain roles within the team.
-
Add one or more new navigation items for Peak Amplify – each entry will appear on the left-hand menu of the WxCC Agent Desktop for the Teams where this Desktop Layout is used, and the roles for which the navigation section is added in the JSON file.
-
Please use the following template for each navigation item (replacing the <INSERT PEAK AMPLIFY SHARABLE LINK HERE>):
{
	"nav": {
		"label": "Peak Amplify",
		"icon": "https://pawxcc-assets.s3.ap-southeast-2.amazonaws.com/PAWXCC-logo.png",
		"iconType": "other",
		"navigateTo": "Peak Amplify",
		"align": "top"
	},
	"page": {
		"id": "Peak Amplify",
		"widgets": {
			"right": {
				"comp": "agentx-wc-iframe",
				"attributes": {
					"src": "<INSERT PEAK AMPLIFY SHARABLE LINK HERE>"
				},
				"wrapper": {
					"title": "Peak Amplify",
					"maximizeAreaName": "app-maximize-area"
				}
			}
		},
		"layout": {
			"areas": [
				[
					"right"
				]
			],
			"size": {
				"cols": [
					1
				],
				"rows": [
					1
				]
			}
		}
	}
}-
This example creates the following navigation item:
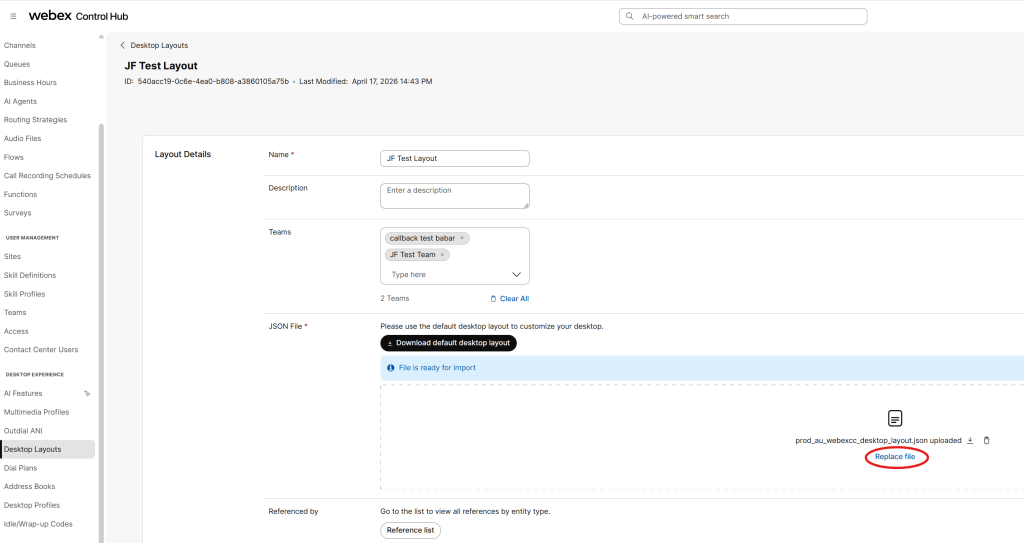
Upload the modified Desktop Layout
-
Upload the modified Desktop Layout and save the change.
Refresh Agent Desktop
-
Ask users in the assigned team must refresh their browsers to see the additional Peak Amplify navigation item(s) on the left-hand side of WxCC Agent Desktop.
Important Notes
-
If a user belongs to multiple teams and cannot see the wallboard icon, confirm they are signed in to the correct team.
For further information on Peak Wallboard for Webex Contact Center, see our product page.